Radiology Imaging (Orthanc)
NidanEHR uses Orthanc, an open-source Picture Archiving and Communication System (PACS), to manage radiology imaging. Orthanc stores, retrieves, and shares medical images in the DICOM (Digital Imaging and Communications in Medicine) standard, and is integrated with the clinical and billing systems.
When a clinician places a radiology order in OpenMRS:
- The order synchronizes to Orthanc.
- A billing record or quotation is generated in Odoo POS for payment.
- Radiology staff perform the imaging and upload the DICOM images to Orthanc.
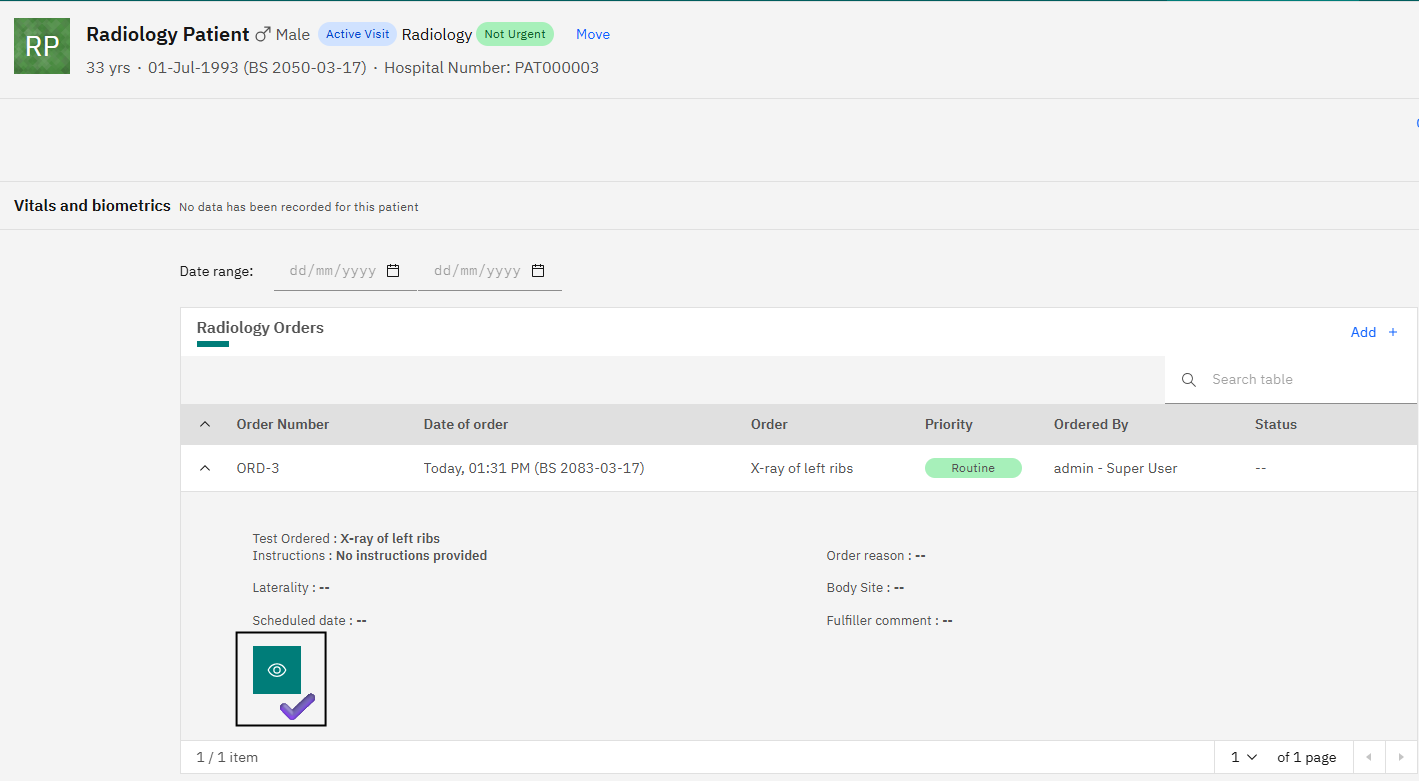
- Once available, the images link to the patient's radiology order and become accessible from the Radiology Orders section of the OpenMRS patient dashboard.
Providers view the images by selecting the View (eye) icon without leaving the clinical system.
Placing a Radiology Order
The imaging workflow starts in OpenMRS during the consultation. A provider selects the imaging service, links it to the patient's encounter, and places the order through the Order Basket in the Radiology Order section.
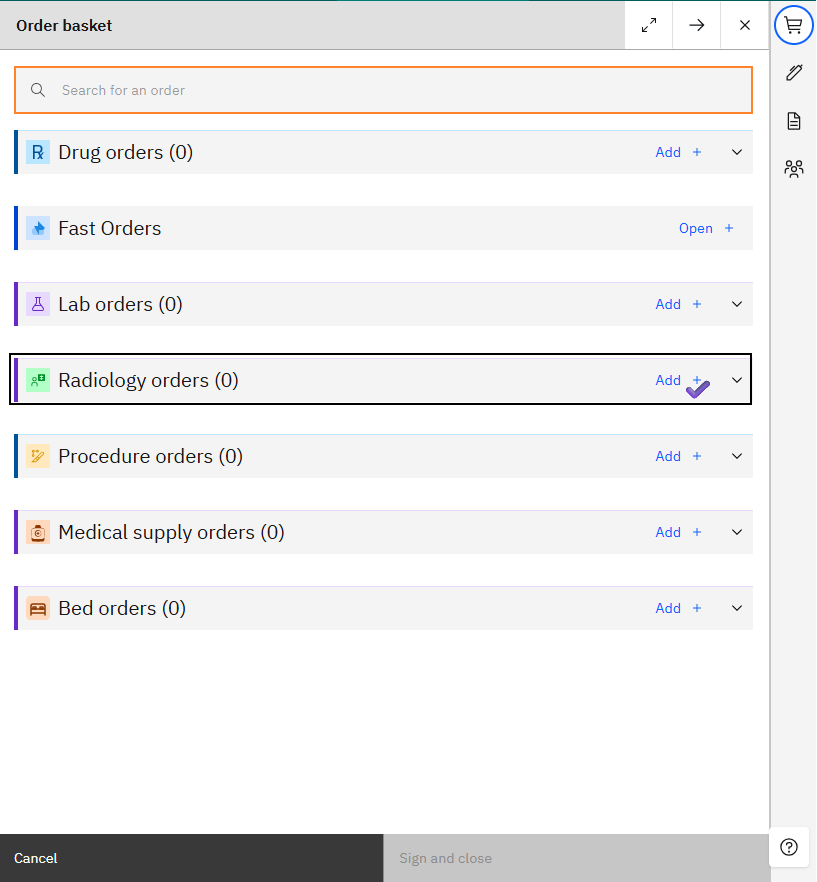
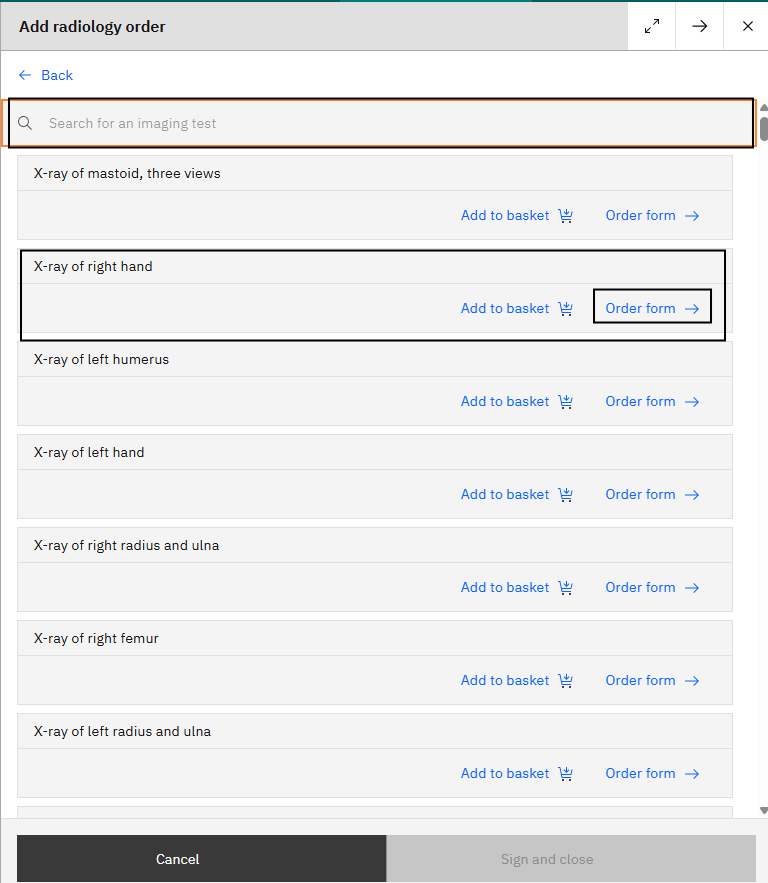
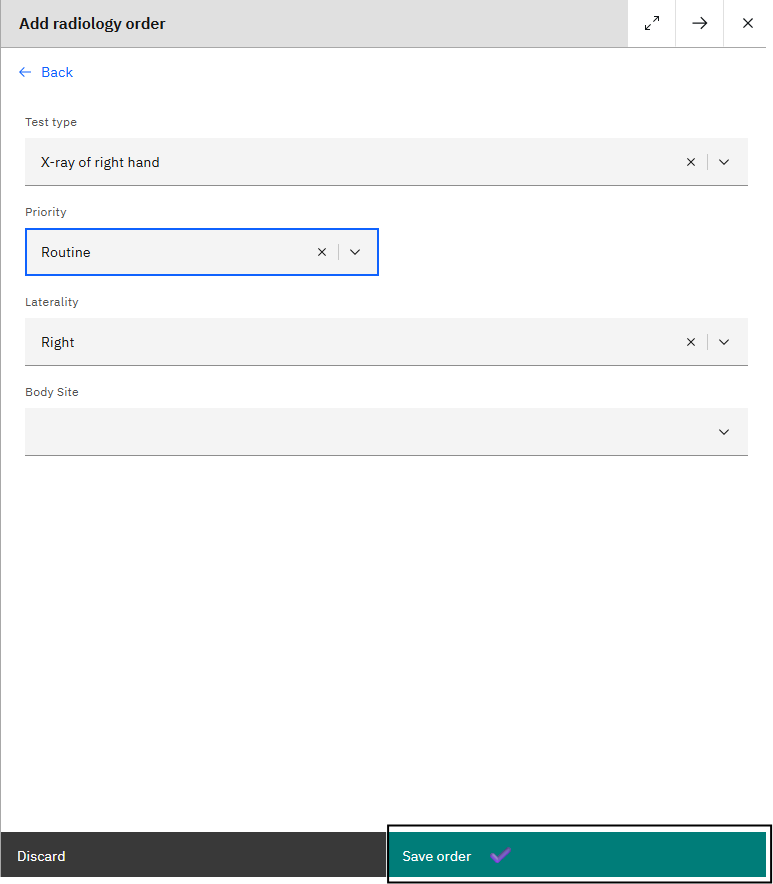
Once submitted, the order generates a billing record in Odoo POS and synchronizes to Orthanc, where it appears in the Worklist for the radiology team. The same order is listed in the Radiology Orders section of the patient dashboard.
Worklist
Once a radiology order is placed in the clinical system, it synchronizes to Orthanc and appears in the Worklist. The Worklist shows pending imaging requests with patient details, the requested examination, and the requesting provider. Radiology staff select an order, perform the examination, and upload the acquired DICOM images.

If Orthanc is integrated with the imaging equipment (X-ray, CT, MRI, or ultrasound), acquired images transmit to Orthanc automatically after the examination and appear in the All Local Studies section, each linked to the corresponding patient and radiology order.
Manual DICOM Upload
Orthanc also supports manual uploads for images acquired from standalone devices or external imaging centers. Upload DICOM files directly through the Upload section. Uploaded files are stored in All Local Studies and linked to the corresponding patient and study.
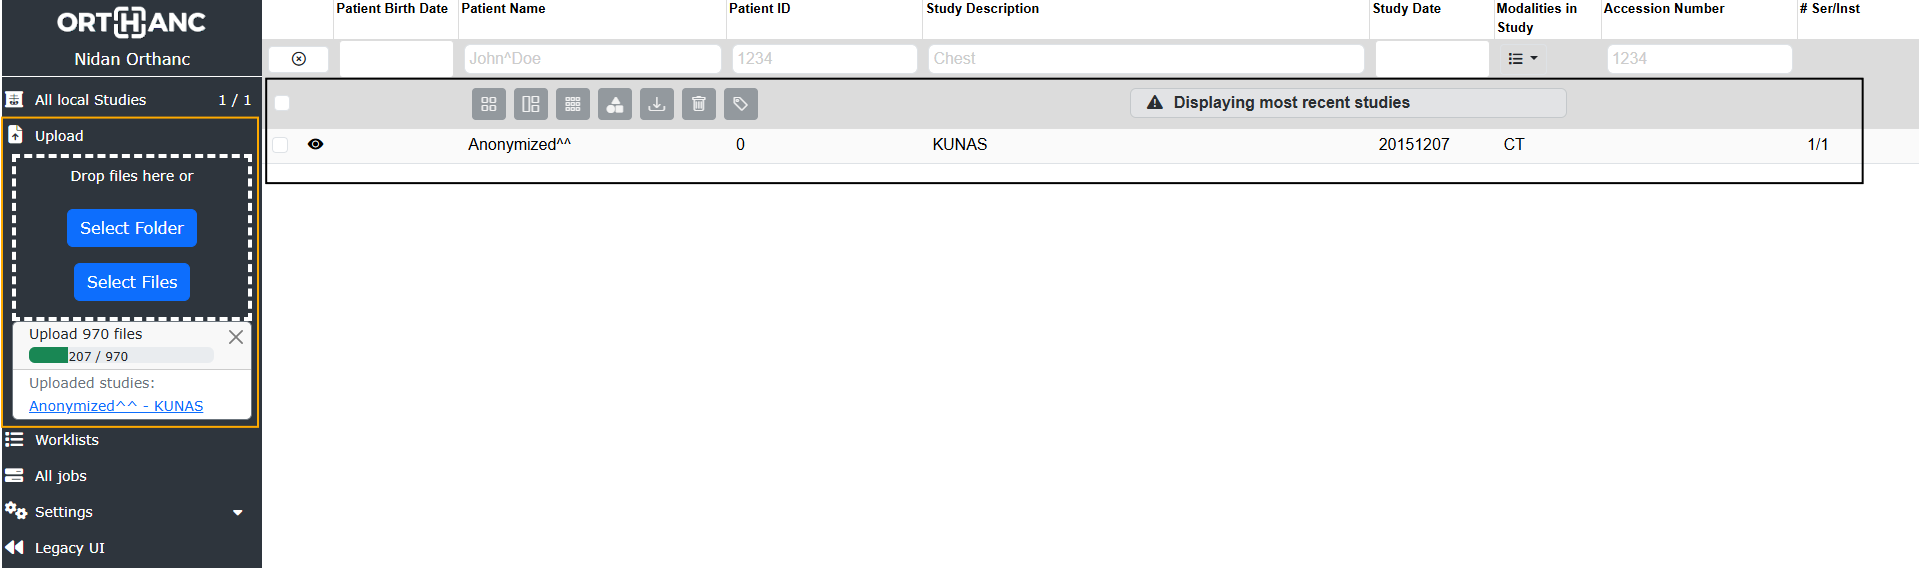
Linking an uploaded study to a patient
A manually uploaded study is linked to the correct patient and order by setting its Accession Number to match the accession number generated during the radiology order. In this example, the order from the worklist carries accession number ORD-10, which is applied to the manually uploaded image.

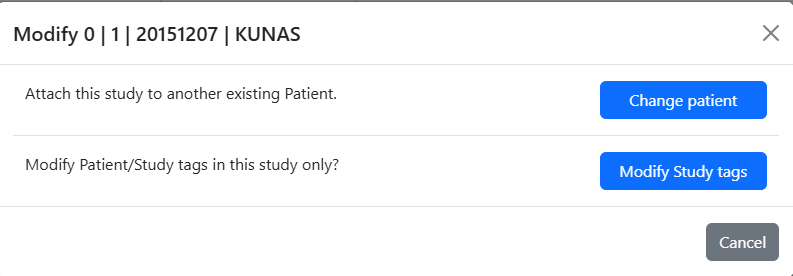
Update the Accession Number from the All Local Studies section by selecting the Edit (pen) icon for the study.
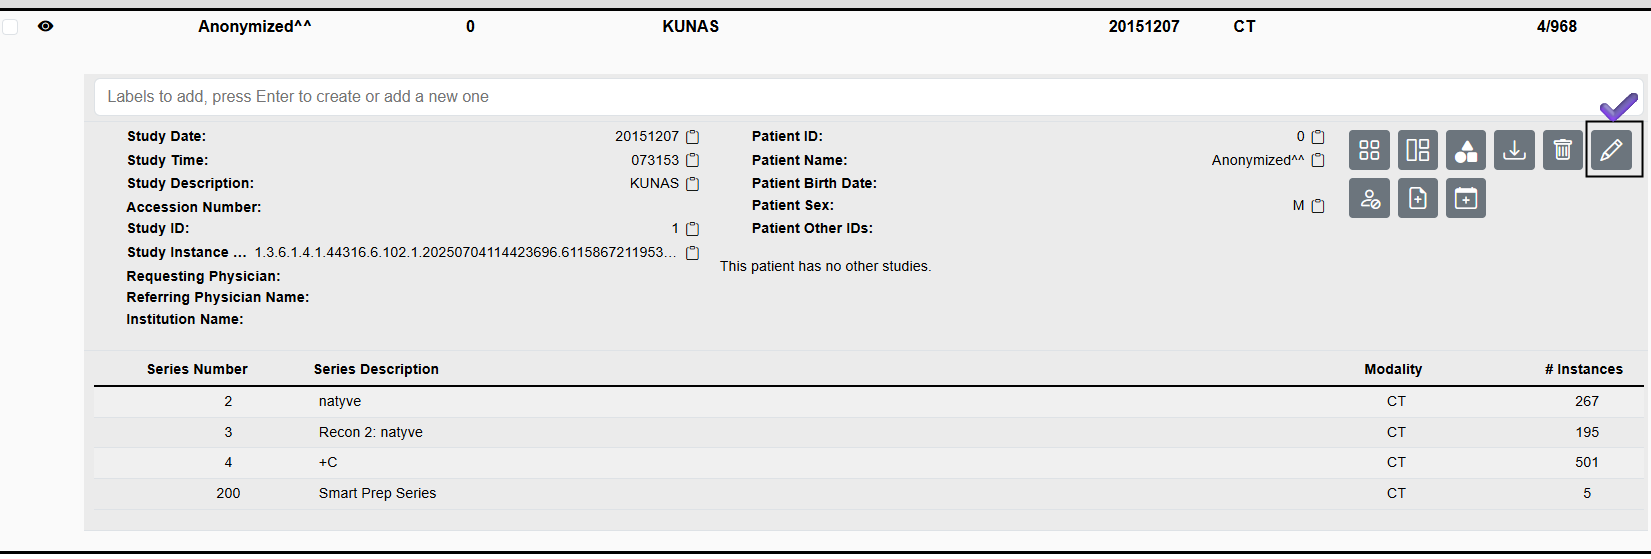
After entering the correct Accession Number and saving, the study links to the matching order and patient record. The images then become accessible from the Radiology Orders section of the patient dashboard.
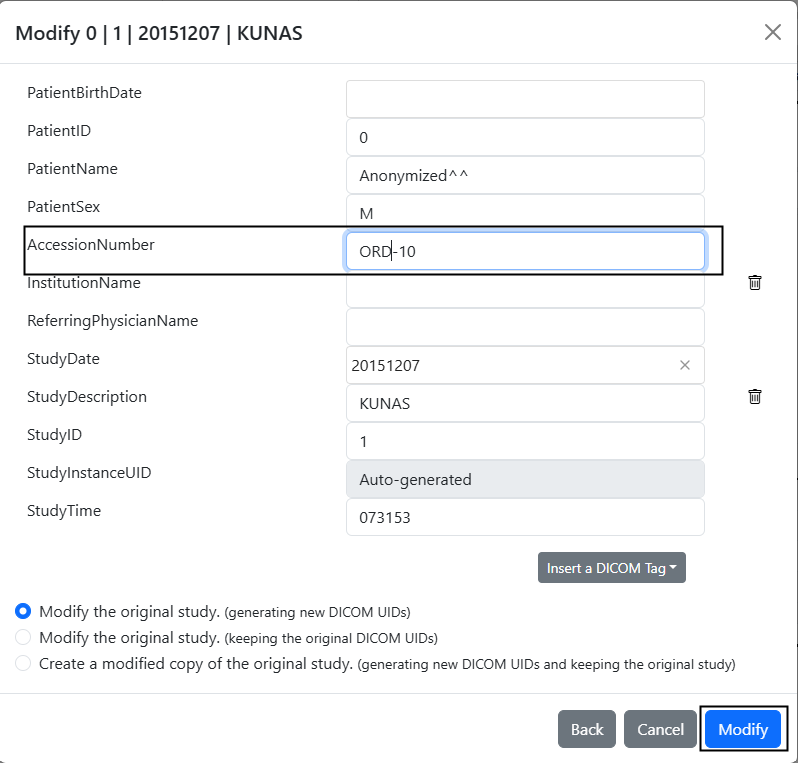
Once the upload is complete in Orthanc, the eye icon on the patient dashboard changes from disabled to enabled, and the provider can view the image directly from the clinical dashboard.